















Show or hide the Articulation Pad to view and control your instrument’s articulations.

Show or hide the Controller and its MIDI CC sliders for vibrato, dynamics, legato, and other instrument parameters.

Show or hide the Mixer and its MIDI CC sliders to control master volume, microphone levels, reverb, and other mix parameters.

Show or hide the Articulation Editor to configure how articulations are triggered. Define keyswitches, CCs, program changes, or chain positions and assign up to six parameters per articulation.

Show or hide the Onscreen Keyboard below the Articulation Pad to play notes with your mouse, trigger articulations via keyswitches, or to display the pitch range of your instrument.

Show or hide the Preset Manager to import, export, or reset the device. Presets allow you to transfer articulations and settings between projects or share them with other users.

Show or hide the Router. Use the Router if your MIDI controller or keyboard does not provide a Control Surface for Instant Mapping.
Manual MIDI assignments are impractical when controlling multiple KSEM instances.
The Router lets you select a direct MIDI input to bypass MIDI clips and avoid ghost notes or unwanted CC data when recording, or use a separate keyboard for keyswitches to stay independent of the instrument’s pitch range.

Show or hide the Settings to configure general options and preferences such as delay times, rack chain mapping, middle C notation, keyswitch behavior, and more.

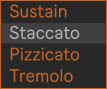
You can automate this menu in the Arrangement View or the MIDI Clip in Session View to draw envelopes for your articulations.
To control it manually, it’s best to use a MIDI controller with a control surface for instant mapping (Bank 1, Slot 1), since manual MIDI assignments aren’t practical when controlling multiple KSEM instances.
Alternatively, you can define a Keyswitch Zone or assign an Articulation CC at the right of the Articulation Pad.
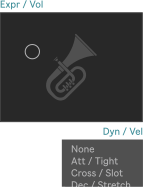
Use the XY Controller to operate two parameters of your instrument simultaneously. This is ideal for shaping dynamics together with volume or vibrato intensity, for example. It is also useful when the device is minimized, as your two most important CCs remain accessible without opening the slider section.
In the Slim Version, the selected MIDI CCs assigned to the XY Controller can be automated in the Arrangement View or in Session View MIDI clips. In Arrangement View, automation is percentage-based. To ensure that a 50% envelope sends a value of 64, set the corresponding CC range to its maximum value by moving the circled indicator in the top-right corner.

The optional gates can prevent cross-talk from preceding MIDI clips.
By default, incoming CC messages from the track are allowed to pass through the gates to avoid confusion. However, it is recommended to block them and allow CC messages only while recording.
The preferred solution is to control the X and Y axes via Instant Mapping (Bank 1, Slots 1 and 2) or by using the KSEM Router.
If you experience cross-talk, you can locate the interfering envelopes in the Clip View Editor under “Envelopes” with the Device Chooser set to “MIDI Ctrl”.
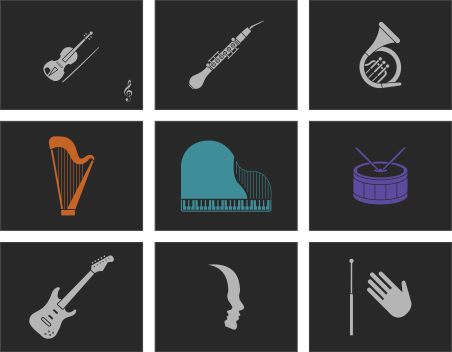
KSEM is designed to help you compose orchestral music in Ableton while maintaining a clear overview of large instrument setups. Displaying an instrument image makes it easier to identify the track you are currently working on.
In the settings, you can optionally display the image in the color of the Ableton track.


Display the slot numbers on the pad. If you have defined a Keyswitch Zone to control articulations with keyswitches on a piano, the notes will be shown instead.
Shortcut: ‘i’

Display the articulation names left-aligned or centered.

Choose a font size that is comfortable for you. For long names, you can make the font smaller so they fit on the pad slots. If you play live and are further from your screen, make it larger.

The Legato Overlap function ensures that MIDI notes overlap so legato passages trigger correctly in your VST. Many libraries require overlapping notes to detect legato transitions. Gone are the days of manually checking each note!
Enable Legato for an articulation in the Articulation Editor and toggle Legato Overlap using this button.
When using a MIDI controller providing a Control Surface for Instant Mapping, switch it on via Bank 6, Slot 1 (Slim Version: Bank 1, Slot 1).
Shortcuts: '/' (slash) = On, ',' (comma) = Off.
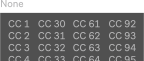
Alternatively, you can control articulations via MIDI CC. Select the desired CC number here.

Decide whether KSEM should respond to the Articulation CC. If you record articulation changes via CC, allow them to pass through this gate only temporarily.
The selected MIDI CC is also recorded in the MIDI clip and may otherwise cause cross-talk during playback and disable automation. If needed, you can locate these interfering envelopes in the Clip View Editor under ‘Envelopes,’ with the Device Chooser set to ‘MIDI Ctrl’ and the CC number you selected above.


The Editor Menu functions as a library where all articulations are stored. Select an articulation to edit it or load it into a slot on the Articulation Pad.
You can create an unlimited number of articulations and keep them ready for quick access in your current project.
Click the pen icon to rename an articulation.
You can enter up to six parameters, which are sent sequentially to your instrument. In most cases, a single parameter will be sufficient.
Left fields: Enter MIDI notes (e.g. D5 or C#-1), control changes (e.g. CC 1 or CC 64), program changes (Pgm), or Chain to control an Ableton Rack chain. To use Chain, you must first map the rack's Chain Selector in the KSEM Settings.
Right fields: Enter the velocity for MIDI notes, the value for CCs and Program Changes, or the position of an Ableton Rack chain. The range is always 0–127.
Attention: By default, Middle C (c' / 60) is C3 in Ableton, not C4. The supported range is C-2 to G8. In the Settings, KSEM can be configured to display Middle C as C4 instead. Program Changes are only available with VST2 plug-ins. Some hardware manuals use the value range 1–128 for program or preset banks, so remember to subtract 1.
Shortcut: Use the 'Tab', 'Up', and 'Down' keys to move between parameters. Press 'Enter' when you have finished your settings.

Some libraries have samples with a few milliseconds of silence before the attack. For short, accented articulations (e.g., staccato or marcato), this can cause them not to play exactly on the beat.
To compensate, KSEM can trigger the notes of these articulations a few milliseconds earlier.
Note: Make sure Delay Compensation is enabled to automatically offset the resulting latency, or adjust it manually in the Track Delay section.

The Legato Overlap function ensures that MIDI notes overlap so legato passages trigger correctly in your VST. Many libraries require overlapping notes to detect legato transitions. Gone are the days of manually checking each note!
Enable legato for legato articulations and toggle Legato Overlap using the button next to the pad.
Note: The MIDI notes themselves are not modified. Only the note-off messages are delayed until the next note has started.

Sometimes it can save time when composing to create articulations using transposed or layered notes without modifying your original composition. Select from 12 interval options, ranging from a minor second to octave doubling.
You can also choose whether only the transposed note or both notes should be played. If the lower note is white, both notes are triggered. If it is grey, only the transposed note is played.

Create a new articulation. All articulations are stored in the Editor Menu. To make an articulation available, load it into a slot on the Articulation Pad.
Shortcut: ‘+’ (plus)

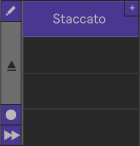
Click the plus button in a slot on the Articulation Pad to create a new articulation and load it directly into the selected slot.
Shortcut: ‘*’ (star).
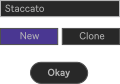
When creating a new articulation, you can clone an existing one. Cloning copies all parameters into a new articulation, so you don't have to enter them again. Click 'Clone' and then select the articulation you want to duplicate.

Some libraries select articulations using a combination of multiple parameters. To avoid re-entering them each time and speed up your workflow, you can copy the parent slots to the clipboard. Then paste them elsewhere and adjust only the child slot.
Shortcuts: ‘Ctrl+C’and ‘Ctrl+V’.

Use the eraser to clear all parameters without deleting the articulation or its name.
Shortcut: ‘Del’ (delete)

Delete the articulation.
Note: No keyboard shortcut is implemented in order to prevent accidentally deleting an articulation. The ‘Del’ key only activates the eraser tool.

Load the articulation to the Articulation Pad so it can be selected and used in your composition.
Click the button and choose a slot, or simply press ‘Enter’ to confirm the currently selected slot. The same button can later be used to remove the articulation from the Articulation Pad.
Shortcuts: ‘>’ (arrow right) to load the articulation and ‘<’ (arrow left) to eject it

Fast forward! Load all your articulations at once in alphabetical order. You can then rearrange them on the Articulation Pad to sort them as needed.

Enable Record Mode to automatically load the selected articulation from the Editor Menu into the next available slot on the Articulation Pad.
Disable Record Mode when finished to avoid loading articulations unintentionally.
Shortcut: ‘@’ (at)

For a better overview, you can assign different colors to your articulations.
For example, give all short articulations (staccato, spiccato, pizzicato, etc.) a different color than sustain articulations, phrases, repetitions, effects, and so on.
Shortcut: Press ‘=’ (equals) and then 1–6 within 3 seconds to set the color.

By default, the Articulation Editor sends updated parameters to your instrument after each change, allowing you to immediately check whether they are correct.
However, this may be disruptive if you need to enter multiple parameters for an articulation. In that case, mute the Articulation Editor so it doesn’t alter your VST player while you are still editing.

Remove all articulations from the Articulation Pad.
Don't worry — they are not deleted permanently and can be loaded again from the Editor Menu at any time.
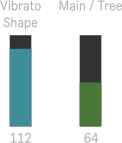
Operate the sliders via Instant Mapping (Banks 1–3 for CC Controls; Banks 4–5 for the Mixer).
If your MIDI controller does not provide a control surface for Ableton, use the KSEM Router or allow CCs to pass through the gate only while recording.
Sliders can be automated in the Arrangement View or in Session View MIDI clips. In the MIDI clip, automation is percentage-based. Set the corresponding slider to its maximum value in KSEM so that a 50% envelope in the MIDI clip sends a value of 64.
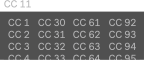
MIDI CC messages consist of a number and a value. You control the value with the slider, and you can change the number here.
For example, CC 1 is called Modulation and often controls parameters such as dynamics or velocity of your instrument. CC 7 is Volume, etc. Check the manual of your VST to see which CC numbers control which parameters, for example vibrato, attack, or legato time.

The optional gates can prevent cross-talk from preceding MIDI clips.
By default, incoming CC messages from the track are allowed to pass through the gates to avoid confusion. However, it is recommended to block them and allow CC messages only while recording. Best practice is to operate the sliders via Instant Mapping or use the free KSEM Router.
If you experience cross-talk, you can locate the interfering envelopes in the Clip View Editor under “Envelopes”, with the Device Chooser set to “MIDI Ctrl.
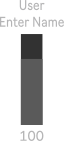
KSEM includes labels for the most common VST parameters.
If a parameter is missing, you can rename this user label to match your instrument, making it easy to remember what the slider controls. Simply click on the label to edit it.

Show the extended slider section to access sliders 17–23.


If you want to control articulations with keyswitches, you can define a Keyswitch Zone here. The selected range is indicated by an orange line below the keyboard.
If the Keyswitch Zone overlaps with the playable range of your instrument, or if you prefer placing keyswitches beyond the range of an 88-key keyboard (C-2 to G#-1 / C#7 to G8), you can split the zone by defining an additional note when using KSEM32 Studio or KSEM48 Pro.
For better orientation, you can display the keyswitches directly on the Articulation Pad by activating the fermata button in the top-right corner.

The green line indicates the practical range.
Notes in the extended range (dark green) depend on the performer’s skill, may require specially adjusted instruments, or can be impractical. However, most professionals can handle them.
For example, C0 is only available on large organs, guitar range depends on the number of frets, they may be pedal tones on brass instruments or rarely played by a string section due to more difficult intonation in higher positions.

Define a keyswitch to re-enable Live’s automation from your piano. A red line under the keyboard indicates its position. This lets you switch articulations manually during an improvisation and quickly return to automation.
For example, use C7 — the highest note on an 88-key piano — as it is rarely played and easy to find.
In the settings, you can choose whether the Automation Key re-enables only the articulation or all automation in the Live Set.

To ensure that the correct articulation is recalled after a playback jump in Arrangement View, make sure that Ableton's "Chase MIDI Notes" option is enabled.
If the first note still triggers the previous articulation after a playback jump or when passing an automation breakpoint, the gap between sending articulation parameters and the musical notes is not long enough. Enable the delay or increase the delay time.
Hardware instruments in particular may need additional time to load the new program, but it may also be required for VSTs depending on your system configuration (e.g. audio interface buffer size) and Ableton version.

Do you want to compensate the delay time manually using Ableton’s Track Delay Section, or use “Menu → Options → Delay Compensation”? In the latter case, the patch’s defined latency is used to compensate it automatically.
Note: If you switch the chain of an Instrument or Effect Rack, the delay cannot be compensated automatically. You must then delay the track manually to use “Chase MIDI Notes” for flawless playback.

If your VST library does not provide keyswitches, you can create your own using an Instrument Rack.
To switch a rack’s chain, define a chain value in the Articulation Editor instead of a MIDI note, CC, or Pgm. If no longer needed, press the Map button again to unmap.

Some libraries require keyswitches to be held while playing musical notes. KSEM can handle this.
Enable this button to send the keyswitch to your VST whenever a note is played and keep it active until the last note fades out.

When enabled, the instrument image displayed in the XY Controller adopts the color of the Ableton track. This improves visual orientation when working with many instruments.

Since version 11, Ableton supports MPE (MIDI Polyphonic Expression).
This lets you apply pitch bend, for example, to individual notes, whereas previously all notes were affected equally.
When activated, KSEM supports MPE and passes the MIDI signal through unchanged. You can switch it off if your instrument cannot handle MPE.

The pre-defined pitch ranges represent standard playing ranges. Consider them only as a guideline when scoring for professional orchestral musicians — your VST may support additional notes!
Instruments can vary (e.g., number of frets on a guitar), and musicians’ skills differ too. What one trombone player can play as the highest or lowest pedal note may not be the same for another.
Adjust the ranges here to suit your needs.

The Legato Overlap function ensures that all your MIDI notes overlap so that legato passages play correctly in your VST.
By default, a gentle time value of up to 100 ms is applied for gaps.
You can increase this up to 3 seconds to even connect individual staccato notes and hear how they would sound in legato. In that case, make sure to turn off Legato Overlap during the last note of the phrase, otherwise it may be played noticeably too long.
Note: Restart playback after changes.

After creating a new articulation, the text field of the first parameter is automatically selected. This allows you to start typing immediately, for example when entering a note for a keyswitch.
By default, this feature is enabled for a faster workflow, but you can disable it here if it does not suit your workflow.

Middle C (c’ / MIDI note number 60) is called C3 in Ableton, and the piano roll ranges from C‑2 to G8.
In music theory, the same note is referred to as C4, with octaves extending from C‑1 to G9. Many VST libraries display keyswitches according to the C4 convention.
To save you some headaches when entering parameters for articulations and to avoid mistakes, you can switch the KSEM user interface to C4 here.

The Automation Key lets you re-enable automation directly from your piano without using the computer mouse. This allows you to switch easily between improvisation and automation during a live performance, for example.
You can assign the key next to the Onscreen Keyboard.
Here you can choose whether the Automation Key restores only the articulation or all automation in the Live Set.


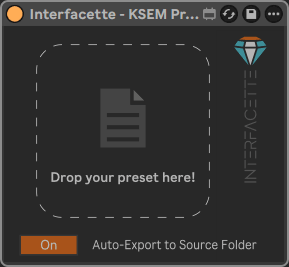
Export articulations, MIDI CC assignments, and general settings as a preset. This allows you to transfer articulations and settings between projects or share them with other users.
The preset is saved as a JSON file and can be imported into other projects.

Import presets of the KSEM or Cubase/Nuendo Expression Maps.
For faster workflow, preset files can also be dragged directly from the file browser onto the KSEM interface.

Attention! This button will delete all your keyswitches and settings.

This menu only appears when importing a preset that contains multiple instruments. Use it to select the instrument you want to load.


Enable this button to receive the signal from the Router.
The signal lines on the button will help you confirm whether the connection is successful.
If it doesn’t, double-check that your settings are correct here and in the Router (same Group ID, track must be armed, correct MIDI input selected, etc.)

Choose the Group ID for the Router. Set the same Group ID in all KSEM instances that should respond to the Router. Different KSEM instances can belong to the same group.
Suggested group names such as "Strings", "Brass", "Woodwinds", "Keyboard 1", or "Live Show" are provided for convenience.
The "Track Number" option ensures that only devices on the same track can communicate with each other, which can be useful for more predictable behaviour when performing live.

Determine whether the track must be armed for the device to respond to the Router’s signals. By default, this option is enabled.
If you play live and want to ensure the device always responds to your MIDI controller, you might want to disable it in that scenario.

Decide whether the device should receive keys only from the Router.
This allows you to use a separate piano or pad controller to operate the keyswitches exclusively. You won’t block any part of your primary piano for keyswitches, and you remain independent of the instrument’s pitch range. You also avoid ghost notes in the MIDI clip when recording.
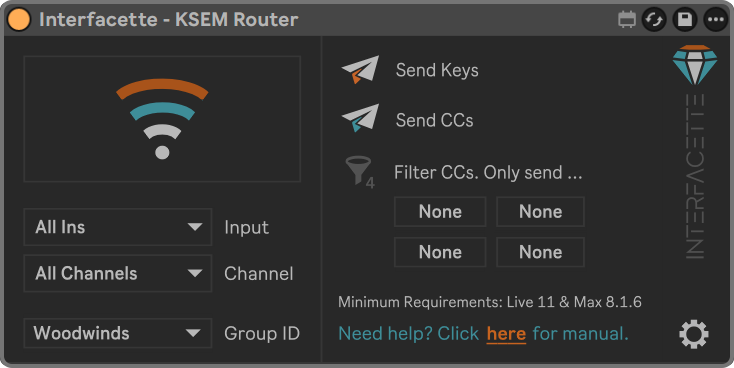
The display shows whether the KSEM Router receives an input signal. The signal lines help confirm that the connection is working correctly.
If neither line flashes, double-check that your input and channel settings are correct.

Choose the keyboard or MIDI controller you want to use for controlling articulations and recording MIDI CCs.

Usually, you can leave this set to "All Channels". Select a specific MIDI channel only if your controller or setup requires it.
Select the Group ID for the Router. Set the same Group ID in all KSEM instances that should respond to the Router. Different KSEM instances can belong to the same group.
Suggested group names such as "Strings", "Brass", "Woodwinds", "Keyboard 1", or "Live Show" are provided for convenience.
The "Track Number" option ensures that only devices on the same track can communicate with each other, which can be useful for more predictable behaviour when performing live.
Disable this option if you only want to control MIDI CCs.

Disable this option if you only want to control MIDI notes.

Filter incoming CC numbers from your keyboard or MIDI controller. All other CCs are ignored and not transmitted. This can be useful if you only want specific sliders or knobs to control the Keyswitch & Expression Map.
Show or hide advanced KSEM Router settings.